For part two of my tutorial series on Occult Chronicles, we’re going to focus on the general gameplay of exploring the house, improving your character and ending your game. We will save combat for the final part to keep things organized.
Tick-Tock:
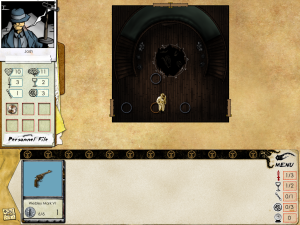
Every game of Occult Chronicles begins with you in the main hall on the ground floor of the manor. Regardless of the story you choose while setting up a new game, the manor has the same basic floor plan through each game. There is a ground floor, second floor, attic, basement and caverns under the manor.
That by the way is also how the difficulty curve of the game grows throughout each floor. Going from the main floor to the basement is practically suicide as the encounters scale up dramatically.
Now before we get moving let’s talk about the main screen:
On the left hand side you can see my character’s stats along with my health and sanity points. The weird icon below them is my artifact that I got for choosing the police officer background.
On the bottom right corner of the screen with the attribute icons, represents tabs for the different feats and abilities associated with each attribute. The number on the left is how many I have while the right number is the limit that I can have available. The sword is highlighted red because that’s the current view on the bottom of the screen where you can see the card with the picture of the gun on it.
If you noticed, there is a 1 on the card which shows its power and corresponds to the 1/3 on the right. Guns are one of the many types of weapons that can be found and have an effect during combat which we’ll talk about in the next part.
The 0/3 for pentacles corresponds to me choosing to put three points into my pentacles attribute, meaning that I can field up to three points of magic related feats.
Lastly the crystal ball represents special items that aren’t related to any of the attributes (although I’ve yet to survive long enough to find any to talk about.)
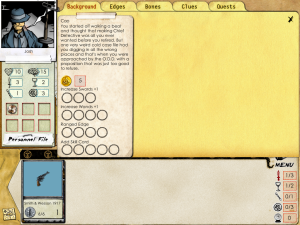
Moving on, clicking on the personal file will bring up five sections. Background relates to the background you choose at the start and can be upgraded through expertise tokens. These tokens can be given to you with certain backgrounds but are more commonly found as rewards for winning encounters.
Each background comes with four stats that can be improved via tokens and it’s important to know that the bonus only kicks in if you fill in all the tokens under the bonus.
At the bottom of the background card there is the “add skill card” upgrade. This will allow you to choose another background card that will take the middle space. You won’t have as many upgrade choices with the secondary background as you did with the first though.
Using expertise tokens on this page is vital to winning the game as this is the only way you can permanently improve your character’s attributes to stand a chance against the tougher encounters.
The other pages lets you see any bones, edges, clues and quests you’ve found. While bones, edges and quests are self explanatory, clues are related to taking on the final challenge and either winning or losing the game.
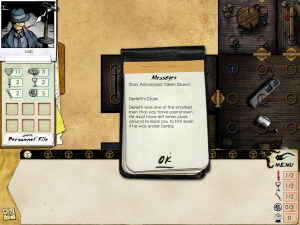
Your ultimate goal in the manor is to find your way into the caverns and stop whatever evil force is down there trying to take over. As you explore the manor, you may find clues hidden in empty spaces. Each clue will provide a special effect during the final encounter all designed to lower the difficulty and give you a fighting chance.
Now you may get the idea to explore every space in the manor, but there is one thing stopping you. On the main screen there are 12 clock icons above the edge inventory. These 12 icons represent the story tokens that have been drawn. At random points during your game, a new story token will be activated and fill up one of the slots from left to right.
Mousing over the token will give you a brief explanation and explain what it does. Some tokens will make things easier for you, while others will make the game harder. Regardless, their effect lasts until the next token has been drawn. If you have not beaten the game before the final token has been drawn, the bad guys will complete their plan and you will lose the game regardless of anything else.
With that out of the way we can talk about the manor. Each floor is made up of numerous rooms with possible encounters in them. You’ll know you’ve found an encounter if you see a purple ? Many encounters are tied to the type of room you find them in.
After you’ve explored an encounter, if there is still something for you to do with it, it will remain on the map in the form of a green circle. Sometimes encounters may be a part of a quest or the same encounter may have multiple parts to it.
While you’re wandering around you may be attacked by a random encounter which is determined based on where you are in the manor and what story you choose.
Your only options are to fight or run. Running away from any encounter will sometimes place an enemy token on the field, represented by a red skull. These enemies will track you and the only way to lose them is to get two or more rooms away from them.
Alright, with this post close to 1000 words, that means that we have one more part to talk about, which may be the most important aspect.


Pingback: Occult Chronicles Tutorial Part 1 -- Building an Agent | Game Wisdom()
Pingback: Occult Chronicles Tutorial Part 3: Sanity Solitaire | Game Wisdom()